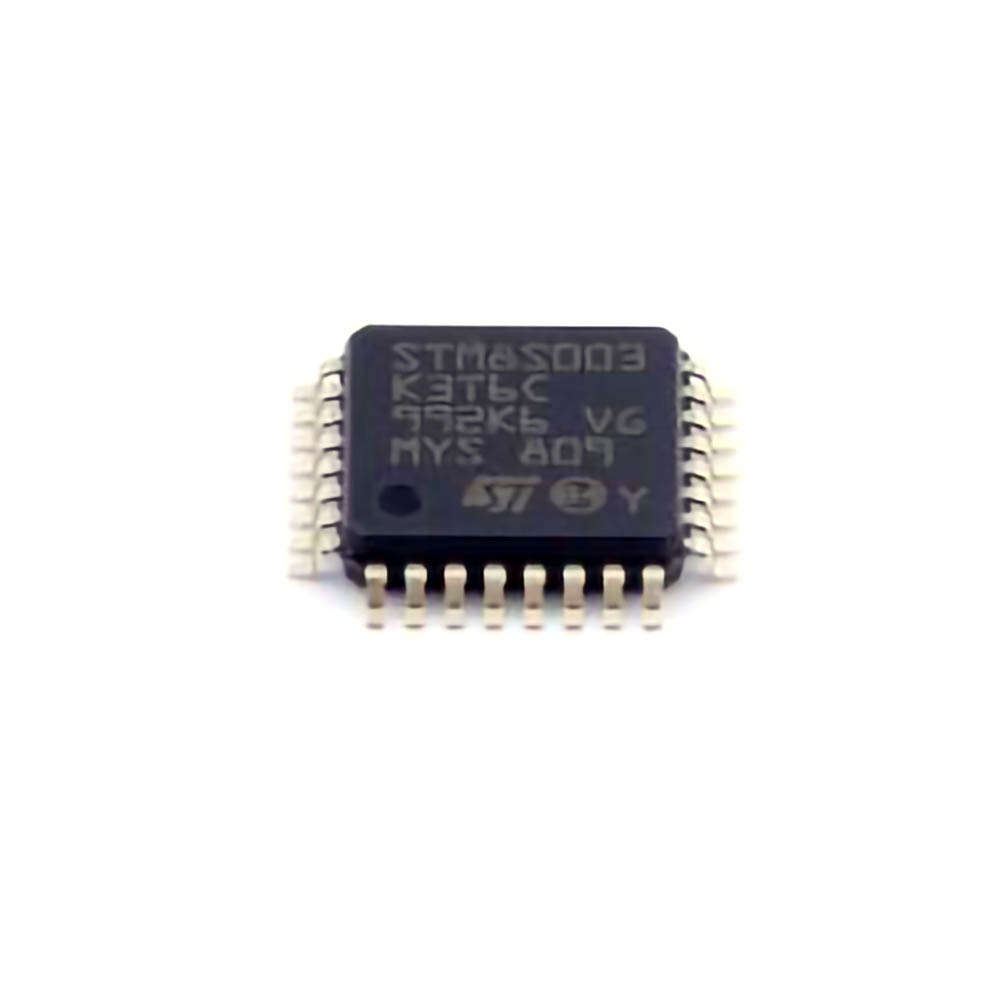
his article provides an in-depth exploration of the common issues that users may encounter when working with the STM8S003K3T6C microcontroller, along with practical troubleshooting strategies and solutions. Aimed at both beginners and experienced developers, this guide offers valuable insights into diagnosing and fixing potential problems that may arise during development and deployment.
STM8S003K3T6C, microcontroller troubleshooting, STM8S003K3T6C common issues, STM8S003K3T6C solutions, STM8 microcontroller, embedded systems, firmware debugging, STM8 troubleshooting tips
Common Issues with STM8S003K3T6C Microcontroller and Their Troubleshooting
The STM8S003K3T6C microcontroller from STMicroelectronics is a popular choice in embedded systems for its low Power consumption, small package size, and versatile features. However, like any piece of hardware, it’s susceptible to various issues that developers may face during the design, development, and implementation phases. Understanding these issues and how to troubleshoot them is crucial to ensuring a successful deployment.
1. Power Supply Issues
Power supply problems are a common issue when working with microcontrollers, and the STM8S003K3T6C is no exception. Incorrect voltage levels, noisy power rails, or poor decoupling can cause the microcontroller to behave unpredictably or fail to start up altogether.
Symptoms:
The microcontroller does not power up.
Unstable operation or resets during operation.
Erratic or inconsistent behavior.
Solution:
Check Power Source: The STM8S003K3T6C operates at 2.95V to 5.5V, so ensure that your power supply is within this range. Use a reliable voltage regulator if your input voltage fluctuates.
Use Adequate Decoupling: Place 100nF ceramic capacitor s as close to the power pins of the microcontroller as possible to reduce power supply noise and filter out high-frequency spikes.
Measure Voltage: Use a multimeter or oscilloscope to measure the voltage on the Vdd and Vss pins. Ensure that the voltage is stable and within specifications.
2. Incorrect Clock Source Configuration
The STM8S003K3T6C can be configured to use different clock sources, including the internal 16 MHz oscillator or an external crystal oscillator. If the clock source is misconfigured, it can lead to malfunctioning or no clock signal being applied to the microcontroller.
Symptoms:
The microcontroller fails to execute instructions.
Program hangs or behaves unexpectedly.
Peripherals fail to function.
Solution:
Verify Clock Configuration: Ensure that the correct clock source is selected in the microcontroller’s configuration registers. Check the microcontroller’s datasheet to see which clock sources are supported.
Check Oscillator Circuit: If you’re using an external crystal, ensure that the oscillator circuit is correctly designed. Verify that the crystal's frequency is supported by the STM8S003K3T6C.
Use an External Debugger: If the microcontroller is still unresponsive, using a debugger like the ST-Link can help you inspect the clock configuration and other system settings.
3. Firmware Corruption or Inconsistent Flash Programming
Another common problem is corrupt firmware or failure to correctly program the flash memory. If the program isn’t correctly loaded onto the STM8S003K3T6C’s flash memory, the microcontroller will fail to execute the intended operations.
Symptoms:
The program does not run after reset.
Unexpected resets or freezes during execution.
Non-functional I/O pins or peripherals.
Solution:
Reflash the Firmware: Use a tool like ST-Link or other compatible programmers to reflash the microcontroller. Ensure that you are using the correct bootloader or programming protocol.
Check Programming Settings: Ensure that the correct programming voltage is applied and that the flash programming steps are correctly followed according to the datasheet.
Verify Flash Integrity: Use tools to verify the contents of the flash memory after programming. You can use a debugger to step through the program and check for any invalid memory regions.
4. Peripheral Initialization Problems
When configuring the STM8S003K3T6C’s peripherals, incorrect initialization sequences or settings can cause peripherals to malfunction. Common peripherals like GPIO pins, timers, UARTs , and ADCs may fail to operate as expected if not properly initialized.
Symptoms:
I/O pins do not respond.
Communication failures over UART or SPI.
Timers or interrupts not firing as expected.
Solution:
Check Peripheral Initialization Code: Carefully review the code for initializing the peripherals. Ensure that the correct clock sources, pins, and modes are selected for each peripheral.
Check Pin Connections: Ensure that the I/O pins are correctly wired, and there are no shorts or open circuits.
Consult the Datasheet: The STM8S003K3T6C’s datasheet contains detailed information on how to configure each peripheral. Use it as a reference for proper initialization sequences.
5. Reset and Watchdog Timer Issues
The STM8S003K3T6C includes a built-in watchdog timer to help recover from software hangs or crashes. However, incorrect configuration of the watchdog timer can lead to unexpected resets or prevent the system from starting up correctly.
Symptoms:
Unexpected resets.
System behaves as though it is in a continuous reset loop.
Firmware hangs or resets during operation.
Solution:
Disable Watchdog Timer During Debugging: If you are debugging the microcontroller and want to prevent resets during programming, disable the watchdog timer (or set a long timeout) to avoid unexpected resets.
Watchdog Timer Configuration: Ensure the watchdog timer is properly configured in the software, especially if it is being used to manage system reliability.
Use Debugging Tools: If the system is resetting unexpectedly, use an external debugger to monitor the watchdog timer’s status and ensure that the system is being properly reset only when necessary.
Advanced Troubleshooting Techniques for the STM8S003K3T6C Microcontroller
While the issues discussed in Part 1 are common and can often be solved with basic troubleshooting techniques, some problems may require more advanced debugging and analysis. In this section, we’ll explore more sophisticated approaches to diagnosing and resolving issues with the STM8S003K3T6C.
6. Communication Protocol Failures (I2C, SPI, UART)
Communication failures between the STM8S003K3T6C and other devices (such as sensors, displays, or other microcontrollers) can be tricky to diagnose. Incorrect protocol configuration, poor signal integrity, or faulty hardware connections can cause communication to fail.
Symptoms:
Data transfer issues on I2C, SPI, or UART.
Communication timeouts or errors.
Devices fail to respond.
Solution:
Verify Pin Assignments: Double-check that the correct pins are assigned for the communication interface you’re using (e.g., SDA, SCL for I2C, MISO, MOSI for SPI).
Scope the Signals: Use an oscilloscope or logic analyzer to monitor the communication lines. Verify that the signals are clean and properly timed according to the protocol's specifications.
Protocol Analyzer Tools: Consider using protocol analyzers to capture and decode communication between devices. Tools like Saleae Logic analyzers can help you visually identify issues with communication protocols.
7. Debugging with STM8S003K3T6C’s On-Chip Debugger
One of the most powerful debugging features of the STM8S003K3T6C is its on-chip debugging capabilities. Using an external debugger (such as the ST-Link), you can directly step through code, inspect variables, and check the state of registers in real-time. However, setting up a debugger can sometimes be challenging.
Symptoms:
Debugger fails to connect to the microcontroller.
Program execution halts or does not behave as expected.
Unable to step through code or read/write to registers.
Solution:
Ensure Debugger Compatibility: Ensure that your debugger (e.g., ST-Link) is compatible with the STM8S003K3T6C. Some older versions of debugging hardware may not support newer microcontroller revisions.
Check Debugger Settings: Verify that the debugger’s configuration matches the target microcontroller’s settings. This includes ensuring that the correct voltage levels are used and that the target device is selected.
Use Debugging Breakpoints: Set breakpoints in your code to check where the execution halts. This will help isolate the part of the program where the issue occurs.
8. Temperature and Environmental Factors
Environmental factors such as temperature and humidity can also affect the performance of your STM8S003K3T6C. Extreme temperatures or electrical noise from nearby components can cause instability.
Symptoms:
The microcontroller operates correctly under some conditions but fails under others.
Fluctuating performance or random resets.
Peripheral malfunction when exposed to certain environmental conditions.
Solution:
Thermal Testing: If the microcontroller is overheating, check its power consumption and heat dissipation. Consider adding heat sinks or improving airflow around the device.
Shielding and Grounding: Ensure that your microcontroller circuit is well-shielded from electromagnetic interference ( EMI ). Use proper grounding techniques and place decoupling capacitors close to power pins to reduce noise.
9. Faulty PCB Design or Layout Issues
Finally, in some cases, issues with the microcontroller may stem from problems with the PCB design or layout. A poorly routed PCB can lead to signal integrity issues, power delivery problems, or unintentional shorts.
Symptoms:
Instability or malfunctioning when the microcontroller is mounted on the PCB.
Inconsistent behavior depending on board orientation or positioning.
Solution:
Review PCB Layout: Ensure that the power and ground planes are solid and have low impedance. Route high-speed signals like clock and data lines away from noisy power lines.
Check for Shorts or Open Circuits: Use a multimeter to check for shorts between pins or open traces in the PCB. Consider running design rule checks (DRC) in your PCB design software to identify potential issues.
Conclusion
Troubleshooting the STM8S003K3T6C microcontroller involves a combination of careful hardware inspection, accurate software configuration, and effective use of debugging tools. While some issues may be straightforward to resolve, others may require more advanced techniques such as using oscilloscopes, logic analyzers, or external debuggers to pinpoint the root cause. By following the solutions and tips provided in this article, developers can save time and effort in resolving common problems, ensuring that their projects proceed smoothly from design to deployment.
If you are looking for more information on commonly used Electronic Components Models or about Electronic Components Product Catalog datasheets, compile all purchasing and CAD information into one place.


